Korean Guys in Car Shooting Each Other With Airsoft Gun
Korean Guys in Car Shooting Each Other With Airsoft Gun
![]()
Hither nosotros are, the beginning of our new lives... over again.

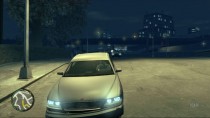
You now have a new safehouse in Bohan, subsequently the last one was burned downwardly past the Russians. Roman says it's time to "start over once more." In this chapter, Mallorie introduces you to two of her friends - Manny Escuela and Elizabeta Torres - both of whom provide work for Niko. Algonquin is unlocked afterward the mission "Blow Your Encompass," and Alderney becomes unlocked at the end of the affiliate.
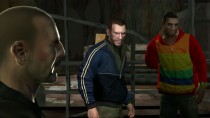
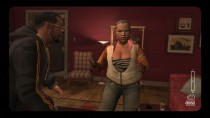
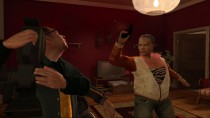
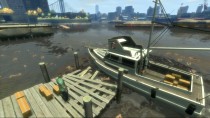
Mallorie introduces Niko to Manny Escuela, a guy she grew up with. Manny is trying to "clean upwards the streets," and he's making a video to record his struggle. He wants Niko to help him accept out some of the dealers in Bohan. Afterward the cutscene, go far a vehicle with Manny and become to the dealer'south identify on Thousand Boulevard. A cutscene shows the dealer leaving his apartment. Follow him, just don't get too shut to him or you lot will spook him. Stay at least two car lengths backside him until he reaches the destination in South Bohan.

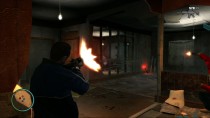
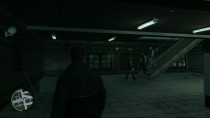
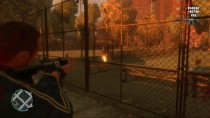
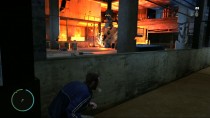
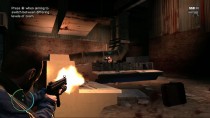
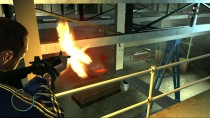
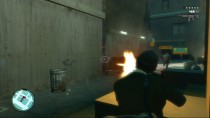
Park behind the dealer when he reaches the destination, and follow him over to the warehouse. Manny goes back to pick up Jay (the photographic camera guy) while yous're taking care of business. Shoot the lock on the door, and and so accept embrace backside the wall. Take out as many dealers as you can from outside the warehouse before moving inside. There is no fourth dimension limit here, so you tin take as long as you like.
In that location is one dealer immediately to your right within the warehouse, and several straight alee. In one case you've taken out as many as you can from outside the warehouse, move inside and immediately take encompass behind the ane of "Redwood" boxes. Take out the remaining dealers inside the warehouse, paying close attention to where they are situated on the radar. Utilise cover at all times, and watch out for the last dealer behind the pillar in the centre of the warehouse. Leave the warehouse once all the dealers have been eliminated, and watch the cutscene as Manny [quite happily] takes all the credit for your piece of work!
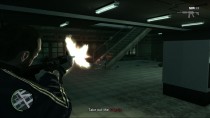
![]() Dimitri calls and threatens to hunt Niko down and kill him, because he never paid Bulgarin the coin he owed him.
Dimitri calls and threatens to hunt Niko down and kill him, because he never paid Bulgarin the coin he owed him.
Manny introduces Niko to Officer McReary, before providing the details of the next mission. The mission is very similar to the previous mission in terms of the main objective (take out some gang dealers) except this time it'southward a little easier.

Go to Windmill Street where the gang members are situated, and run over the two gang members that are continuing by the garage. Once y'all have been spotted, ii of the gang members will attempt to escape in a car, so give chase and spray their vehicle with bullets.
Aim for the wheels initially, and and then terminate them off earlier going back to kill the last remaining gangster at the garage. You can impale him even so you similar, though running him over is without a doubt the simplest selection.
![]() Mallorie has some more than piece of work for you, this time from a character chosen Elizabeta Torres. Follow the 'E' on the radar to take missions from her.
Mallorie has some more than piece of work for you, this time from a character chosen Elizabeta Torres. Follow the 'E' on the radar to take missions from her.
Brucie wants Niko to whack some people for him. Later the cutscene, call 911 and printing 'i' to summon a police car. When the cops arrive, steal their auto and lose your wanted level. When y'all lose the wanted level, Niko will automatically call Brucie for further instructions. Brucie wants y'all to kill somebody called Lyle Rivas.
Cease the police automobile and admission the police figurer. Select 'Search Police force Records' followed past 'Search By Name' and and so utilise the keyboard to type in 'LYLE RIVAS'. Add together his location to the radar, and and then exit the police computer.
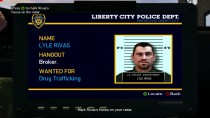
Get to Rivas's business firm and walk into the yellow mark. During the cutscene, Rivas makes an escape through the bath window. Leave the building through the door you came in, and begin chasing Rivas. Shoot his car until it blows up, then run him over when he attempts to escape on foot. Niko calls Brucie to confirm that Rivas has been eliminated.
![]() Brucie invites you to encounter him for more work.
Brucie invites you to encounter him for more work.
According to Brucie, the guy you only killed (Lyle Rivas) had a car "worth stealing," which he left in an alleyway off of Yorktown Avenue in Steinway. Brucie wants you to become it and bring it back to his garage. When you become inside the vehicle, a cutscene begins, and a machine containing two of Lyle's associates arrives at the scene.
Get the car back to Brucie'southward garage. The two thugs will chase and shoot y'all the whole fashion back. Exist careful when turning corners, considering the automobile volition become damaged very quickly if they manage to block you. Get the machine back to Brucie'south garage in one piece to complete the mission.
The main objective of the mission is quite unproblematic; the only thing you demand to be careful with is your handling of the car. Be patient and slow down when turning corners and you should exist fine. The car volition [probably] be heavily damaged by the time you get it back to the garage, but that doesn't matter.
![]() Brucie wants to talk to Niko about Roman, considering he'southward been "gambling like an animal" and he's out of control.
Brucie wants to talk to Niko about Roman, considering he'southward been "gambling like an animal" and he's out of control.
Rivas'south cousin owes Brucie a lot of coin, so he wants Niko to go and take care of him. During the cutscene, Roman creates a profile for Niko on Love Meet, which he's going to use to try and accommodate a appointment with Rivas's cousin. Go to the [email protected] internet buffet, and Niko will automatically phone call Brucie in one case he arrives there. Brucie tells y'all to log on and access love-come across.net, and then search for a guy called French Tom.
Go to ane of the computer terminals and admission the web. Go to love-meet.net and click on the 'males' icon, and so locate French Tom. Scroll to the bottom of the page and click on the button to arrange a date. You are now complimentary to conduct other business organisation while you wait for French Tom to respond. Once he does reply, Roman volition transport a text message telling y'all to bank check your emails.
In the response, French Tom tells yous to meet him at the 69th Street Diner on Hove Beach at 18:00, then become there and wait for him. Approach French Tom inside the diner, and Niko will begin talking to him. When you are prepare, stand up up and eliminate French Tom to consummate the mission.
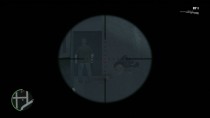
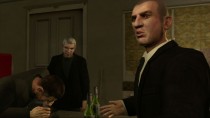
Mallorie introduces Niko to Elizabeta, who then introduces Niko to Patrick McReary, a guy she's setting up a deal for. Elizabeta doesn't trust the guys that Patrick will be dealing with, so she wants Niko to act every bit his "guardian angel" and make sure that zippo goes wrong. The bargain is taking place at Joliet Street, and Patrick has left a rifle on the roof of the place side by side door.


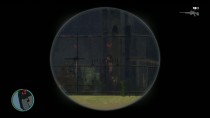
Go to the edifice in South Bohan, and then become up to the roof and collect the sniper burglarize that Patrick has left for you. Stay crouched and watch over the deal using the sniper rifle. About 25 seconds later the cutscene, the dealers begin to shoot at Patrick and his associate. Zoom in with the sniper rifle and take out all of the attackers. Take your fourth dimension with each shot and bargain with 1 person at a time.
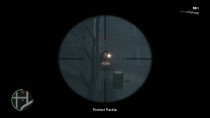
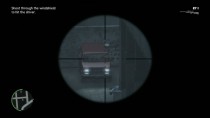
I of the attackers gets in a tussle with Patrick, so snipe him, so three more attackers volition arrive. One time you accept taken out the iii attackers, the terminal assailant will attempt to escape in the van. Snipe him through the windshield to consummate the mission. Afterwards, Niko calls Elizabeta to let her know that Patrick is rubber. She invites y'all back to her apartment for more than piece of work.
Elizabeta introduces Niko to Johnny, who is currently sitting on a big pile of heroin. Elizabeta has found a buyer for him, and she wants Niko to oversee the deal and ensure that everything goes okay, and then the objective is similar to the previous mission. She also introduces Niko to Playboy X, who's going to be assisting yous at the deal. Have Playboy to the contact'south apartment, and follow him up to the third floor to encounter Johnny.

During the cutscene, it becomes apparent that the dealers are infact undercover LCPD officers. Find encompass, and take out all of the attackers. Take your time and choice them off ane at a time, and then make your way up to the next floor. As you leave the room, there are ii officers immediately to your right. Take them out, and so follow Playboy up to the next floor, where more officers are waiting to attack. At that place is a first aid kit situated on the roof, so collect it if you need it and then use the wall as embrace. Take out the two remaining officers, and more than will begin to make their way onto the roof.
Follow Playboy down the stairs, where some other officer is waiting to attack you. Once he is expressionless, a two-star wanted level appears. Brand your style down to the ground floor, merely watch out as there are two more officers waiting for you on the stairs. Once you escape from the building, go far the car across the road and lose your wanted level with Playboy. Finally, take Playboy X dorsum to his apartment in Algonquin to complete the mission.
![]() Roman calls to announce that he has collected insurance money from the sometime cab depot, and has invested the money in a brand new 1. The concern is up and running.
Roman calls to announce that he has collected insurance money from the sometime cab depot, and has invested the money in a brand new 1. The concern is up and running.
![]() Playboy X has some work for Niko. Follow the 'X' icon on the radar to go and run across him.
Playboy X has some work for Niko. Follow the 'X' icon on the radar to go and run across him.
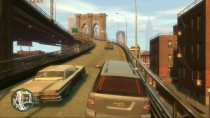
In this mission, Manny wants Niko to eliminate some people he used to roll with, who have been "bad-mouthing him" after watching his new pic. Information technology seems they weren't impressed. Go to the Algonquin Bridge and stop in the yellow mark facing south.

The target you lot are looking for is on the railroad train, so yous demand to follow information technology and eliminate him when he gets off. The chase will atomic number 82 to Cayuga Avenue in Schottler.
Make your style up to the platform and eliminate the three targets. It might exist useful to have embrace earlier launching your assail, but if you start with full health and a decent (quick) weapon such as the Micro-SMG then it shouldn't be necessary.
![]() A text message arrives from an bearding user, instructing you to meet him at the end of the pier at Castle Gardens.
A text message arrives from an bearding user, instructing you to meet him at the end of the pier at Castle Gardens.
![]() Elizabeta wants Niko to go and run into her.
Elizabeta wants Niko to go and run into her.
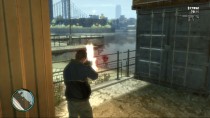
During the cutscene, Elizabeta argues with Fiddling Jacob. She says some people he introduced to her take "ripped her off big time," and she needs Niko to become to the old hospital on Colony Isle and become her coke back. The old hospital is heavily guarded by dealers, and you will demand to eliminate all of them in order to get to Elizabeta's coke. Once yous have the coke, you'll demand to escape from the hospital, and then it may exist a good idea to go to the old hospital before starting the mission to scope it out kickoff.
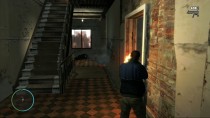
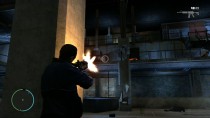
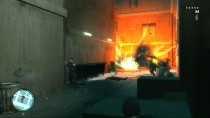
There are multiple approaches to this mission. A proficient way to start would be to stand up well away from the chemical compound, and snipe as many of the dealers as possible before going in. The old hospital is surrounded past metal fencing, and there are two areas of broken fence which you can utilise to enter the complex - ane on the northward side and i on the east. Y'all should enter via the north gap and escape using the eastward gap. Enter the edifice itself via the doorway on the e side of the building. Take cover at all times and eliminate anyone who attacks y'all.
An SMG in addition to a heavy piece such every bit the assault rifle is recommended. Yous'll need plenty of ammo, full health and armour earlier starting the mission. Accept your time, take cover at all times, and eliminate anyone in your path. Be careful when you are going through the principal corridor section of the building, as there are attackers on the upper level of the circuitous every bit well as on the basis - refer to the radar to see which ones are to a higher place you. In that location are first assist kits located throughout the complex, so keep an eye out for them. The coke is beingness guarded in a room by two dealers. Waste product them, and so pick up the bag of coke.
Once you take the coke, North.O.O.South.E volition begin to raid the quondam hospital, and a chopper arrives. Brand your way back to the corridor, and go dorsum out exactly the same way you lot came in. There are two officers waiting to shoot y'all most the archway of the building. There is also a further officeholder waiting outside, who is taking cover behind a burned out vehicle. As mentioned earlier, get out the complex using the gap in the fence on the east side of the building, and then chop-chop jump into the Humboldt river and apply the Jetmax to escape.

Once you lot accept shaken the cops off, become back and meet Little Jacob on Spin Street. During the cutscene, Michelle arrives and reveals that she has been working with the government, and that information technology'southward "her job" to keep an eye on Niko! She says the cops are ready to accept downward Elizabeta, and demands that Niko easily over the coke. Ouch.


Elizabeta is becoming paranoid considering she knows the police are finally onto her.

Manny and Jay soon arrive at the flat and begin recording a new slice for their moving picture, where they charge Elizabeta of messing up the streets However, Elizabeta is having none of it, and she shoots both Manny and Jay through the head! She then tells Niko to put the bodies in her auto and get rid of them. Elizabeta knows a doctor that will deal with them.
Take the bodies of Manny and Jay to the medico at Dukes Boulevard. 'Natural causes' is his verdict. He says he'll have the organs "out on the streets in no time." Excellent!
Brucie wants to testify off his new car by taking function in a street race, but Lenny (the mechanic) screwed something up, and he at present has nothing to race with. Brucie wants Niko to accept him to Freetown Avenue in Willis so that you lot tin can take Steve'south car to the race instead. It'due south a yellow Comet.

One time you have the car, go to the starting point and prepare to race. As long every bit you don't crash, you should exist able to finish first with fairly relative ease. Take information technology easy at corners, ho-hum down and brake properly otherwise it could cost you the race. The other five drivers aren't exactly peachy - they tend to crash a lot, and then all you need to exercise (basically) is not crash!
Accept Brucie habitation once the race is finished, to complete the mission.
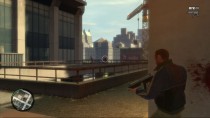
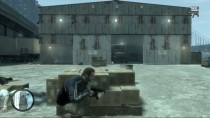
Playboy's old friend, Dwayne Forge, just got released from prison, and he is disgruntled that Playboy has moved on and left him backside. Playboy has left some weapons for you in an alleyway at Castle Gardens for the next mission, and he explains the details of the task on the fashion there. Apparently, the mafia have taken over a structure site belonging to Yusuf Amir, a big real estate developer who Playboy is aiming to impress. Playboy wants you to take out the mobsters guarding the site, and regain control of it for Yusuf.
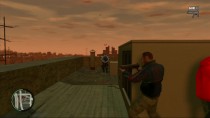
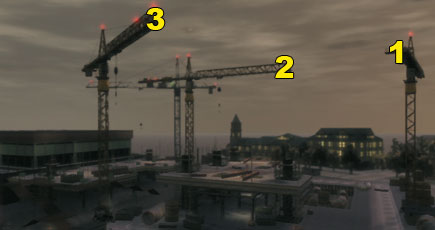
Get in the car in the alleyway to call up the weapons (a sniper rifle and grenades) and then walk into the window cleaning platform. Make your manner to the top of the building, in order to give you a clear view of the enemy lookouts. Have out the 3 lookouts (1-3 on diagram) using the sniper rifle, and then take out some of the guards on the ground to make life a little easier when you lot enter the construction site subsequently. Once yous've taken out as many guards as possible, become back to the platform and caput into the construction site. You can take the car in then utilize information technology as comprehend.
Accept out anybody in your way, and then head towards the beginning wedlock leader, who is represented by a red blip on the radar. Have cover at all times, and use the grenades to accept out multiple enemies at in one case. There is a beginning aid kit on the upper level of the construction site, situated at the top of the ramp. Don't move out of cover until you are certain there are no more attackers. Soon, a helicopter arrives with backup for the last remaining matrimony leader. Once over again, take comprehend and eliminate anyone in your way. Kill the terminal union leader to consummate the mission.

![]() Playboy wants Niko to do some work for Dwayne. Playboy will comprehend any costs, since he owes Dwayne.
Playboy wants Niko to do some work for Dwayne. Playboy will comprehend any costs, since he owes Dwayne.
During the cutscene, Dwayne explains that he'southward pissed off at two things. Firstly, he's bellyaching that Playboy doesn't desire to coil with him anymore (instead he sends Niko) and secondly he's pissed that his girlfriend is ignoring him. His girlfriend has been hanging out with someone called Jayvon, who apparently was responsible for Dwayne going to prison. Niko sympathises with Dwayne because he sees a lot of himself in him. He so offers to take care of Jayvon.
Become to the arcade in Chinatown, where Dwayne'south girlfriend (Cherise) and Jayvon are hanging out. Jayvon attempts to escape, and you lot at present accept the pick of executing Cherise or letting her alive. If you let her live, you'll meet her again later on in the story, but it's entirely your choice and it doesn't affect your overall game progress.
Become on the bike parked at the arcade and brainstorm chasing Jayvon. Shoot him off the bicycle and make sure he's dead, then pickup the coin that he owes to Dwayne. Niko calls Dwayne to suit a meeting at the Cluckin' Bong in Algonquin, so he can hand over the coin.

Dwayne seems fairly depressed with how things have been going since he got out of prison house. He says one of the things he lost was a strip order in Bohan called "The Triangle Lodge", which was taken over past gangsters subsequently he got sent to jail. Niko promises to take it back for him.
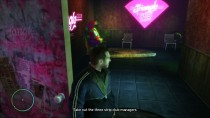
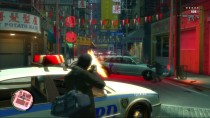
Enter the strip club in Bohan, but don't enter with a weapon drawn or security will attack you. There are 3 managers inside the club, and the beginning thing you lot'll need to do is work out who they are. Approach the get-go two men you come across when you enter the strip club, and heed in on their conversation. They volition reveal the location of the commencement manager, Jose, who is in the staff room counting money. Leave Jose for now, and approach the stripper and the human standing beside the stage. The conversation will reveal that the human (Javier) standing side by side to the stripper is the second manager of the club. Don't kill him yet, instead become to the dorsum room where the tertiary manager is located, so that you now have the locations of all three managers.

The locations of the managers should now be highlighted on the radar. Become dorsum to the get-go manager (Jose) and kill him silently using fists, a baseball game bat or a knife, so that you don't concenter attention from the security. Jose has a gun, and then kill him before he manages to fire a shot in, otherwise security will be alerted. Now approach the second managing director who is standing by the phase, and take cover behind one of the tables in the club. Impale him, and so take out the security men who attack you after. Once most of the security people are gone, exit the social club and follow the third manager, who attempts to escape in a car. Perform a bulldoze-by shooting and finish him off to consummate the mission.
At that place is a growing tension between Playboy X and Dwayne. Playboy now says that Dwayne is start to "become on his fretfulness." Playboy wants you to eliminate someone who has evidently been bad-mouthing him. He hangs out with his team at the basketball courts on Exeter Avenue. Yous need to take a photo of the squad with your new cellphone (given to you by Playboy X) and and so send him the photo so that he can tell you which i to kill.

There are v people in the basketball court. Get a photo of them and send it dorsum to Playboy, but don't become too close to them or they will spot you. Playboy will telephone call yous a few seconds later and tell you which i to kill - each fourth dimension you do the mission it'south a unlike person, so you can't kill the same person every time! If you kill one of the targets before Playboy gets dorsum to you, the crew volition carve up upwards and you'll have to kill all of them, but if you follow the instructions this shouldn't be the case.


You tin can kill Marlon and the other gang members past shooting through the fence, you don't demand to go into the basketball court. Once he is dead, the mission is over.
![]() Playboy calls to express his displeasure at your handling of the strip club situation. He doesn't desire you lot helping Dwayne if it'due south going to "mess up his business organisation interests."
Playboy calls to express his displeasure at your handling of the strip club situation. He doesn't desire you lot helping Dwayne if it'due south going to "mess up his business organisation interests."
![]() Michelle calls and says information technology's important that you run into her at the United Liberty Newspaper building in Algonquin.
Michelle calls and says information technology's important that you run into her at the United Liberty Newspaper building in Algonquin.
![]() Mallorie is concerned that something has happened to Roman, because he didn't come up dwelling house last night.
Mallorie is concerned that something has happened to Roman, because he didn't come up dwelling house last night.
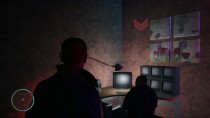
Michelle reveals that her real name is Karen, and takes Niko to meet a friend in office 396. The man (who refuses to reveal his name) wants Niko to notice out about a person called Oleg Minkov, who lives in Iroquois back in Hove Beach. Become to Oleg's apartment and find out anything you lot tin can about him.
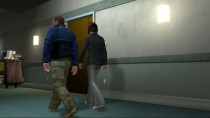
When Niko arrives the apartment is empty, so he kicks the door down and calls the friend from U.50. Paper. He tells you to check Oleg's emails, and retrieve with whatever information that would indicate his current whereabouts. Admission Oleg'southward emails and click on the latest e-mail from "Vasily". It talks almost a meeting at a jewellery shop on Tulsa Street. Niko calls dorsum and the man tells him to kill Oleg at the jewellery store.
Get a car and stop in the yellow marking at the destination. Oleg attempts to escape, so chase him downwards and kill him. When you reach Little Italy in Algonquin, Oleg volition accept a route which becomes blocked by construction textile, and so quickly reverse out of at that place and find a different route. Eliminate Oleg to complete the mission.
![]() Playboy X wants you to become and see him. He has an of import thing to talk over.
Playboy X wants you to become and see him. He has an of import thing to talk over.
Dwayne has irritated Playboy X to such an extent that he now wants him dead. Playboy wants Niko to carry out the striking for him, but Niko says he'll have to have time to consider information technology. Playboy will be in touch shortly.
![]() Dwayne calls soon after the cutscene and reveals that he wants Niko to impale Playboy X! You now accept a decision to make.
Dwayne calls soon after the cutscene and reveals that he wants Niko to impale Playboy X! You now accept a decision to make.
![]() Playboy X calls to ask Niko if he has reached a conclusion yet. Niko says he knows what he's going to do, and you now accept the choice of killing either Playboy X or Dwayne.
Playboy X calls to ask Niko if he has reached a conclusion yet. Niko says he knows what he's going to do, and you now accept the choice of killing either Playboy X or Dwayne.
Who you decide to kill is entirely your pick. Each option has its ain benefits, though killing X appears to be the favoured option amongst the majority of GTA Iv fans. Killing Playboy 10 will earn you his loft (which will deed as a new safehouse) in addition to a new outfit, and it as well means that Dwayne Forge becomes a friend, which itself provides new benefits. Killing Dwayne will earn y'all $25,000 but Playboy refuses to speak to yous afterwards, so at that place are no other benefits autonomously from that.

If you determine to impale Playboy X, caput over to his apartment in North Algonquin. He has 4 or five people protecting him in his apartment, so be prepared with plenty of ammo and armour. Take cover behind the door at the lift, and eliminate each of the guards in the apartment. Throwing a grenade into the flat should have care of almost of them.
Approach 10, and he will spring across the roof to the opposite building, and attempt to make a run for information technology. Make your way to the ground floor and follow him. More of Playboy'due south guards go far in a desperate bid to protect him, so target them and shoot them, but don't worry about 10 getting abroad because he will reach a dead end. Use the pistol to execute Playboy X for a cinematic execution.
Killing Dwayne is considerably easier if you wish to choose that option instead. Go to his flat, walk into the yellow marking and lookout man the cutscene which follows. Kill Dwayne's crazy bat-wielding friend, and then apply the pistol to execute Dwayne.
![]() Mallorie believes that Roman has been kidnapped by some Russians that he owes money to. This phone call is the start of the mission "Hostile Negotiation."
Mallorie believes that Roman has been kidnapped by some Russians that he owes money to. This phone call is the start of the mission "Hostile Negotiation."
In this mission y'all need to rescue Roman, who is being held hostage by Dimitri'southward men at a warehouse off Lompoc in Bohan Industrial. Ensure you accept full health, armour and plenty of ammo before starting the mission. There aren't any particularly difficult aspects of the mission, but you'll need to take out a lot of attackers which requires a bit of fourth dimension and patience.
![]() Dimitri sends a text message containing a photo of Roman with a gun confronting his caput.
Dimitri sends a text message containing a photo of Roman with a gun confronting his caput.
Walk into the yellowish mark at the warehouse when you are ready to begin. Roman is beingness held on the height floor of the warehouse. When you have command of Niko, he will automatically have cover behind the wall. Accept out each aggressor one at a time, and don't movement out of cover until you are certain there are no more gunmen. Blind fire if necessary. At that place is a first aid kit straight ahead if you need any health. Try to kill equally many attackers on the showtime flooring from the ground flooring earlier going up at that place - this will make your chore a lot easier when you lot eventually practice reach the showtime floor.
In one case you lot've taken out as many people as possible, move up to the first flooring and immediately await for cover. Take out any remaining attackers, then move towards the 2d floor. If you need whatsoever health, the showtime aid kit on the ground floor should have respawned by now, so go back down and collect it.
Turn left as soon every bit you lot achieve the second flooring, and once more find cover. There's a first assist kit on the wall up ahead should y'all require it. Have out anyone in your way, then proceed to the top floor where Roman is being held past his kidnapper.
Yous'll know when y'all have reached the peak floor because the arrow on the green radar blip will disappear. When you enter the room where Roman is being held, Roman and his kidnapper emerge from behind a desk. You need to use gratuitous-aim to kill the kidnapper and free Roman. Shooting him once in the arm should exist enough, simply be careful non to fire at Roman. Once y'all have successfully freed Roman, follow him out of the warehouse and take him dorsum to the safehouse in Bohan. The mission ends with a lecture from Niko well-nigh Roman's gambling addiction.
![]() Roman calls to say he has purchased a safehouse in Algonquin. Yous tin can at present save your game in that location.
Roman calls to say he has purchased a safehouse in Algonquin. Yous tin can at present save your game in that location.
U.L.P.C. want Niko to discover someone, and he'll need access to a police computer in gild to do so. Niko is informed that in render for doing these jobs, U.L.P.C. "may or may not" aid Niko look for the person that betrayed him many years ago.
![]() Your contact sends you a text message containing a photo of the target. You'll need to upload this photo to the police computer in order to obtain the location of the target.
Your contact sends you a text message containing a photo of the target. You'll need to upload this photo to the police computer in order to obtain the location of the target.

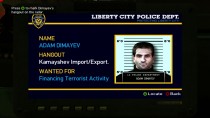
Find a police car and admission the on-board computer. The easiest manner to get a law automobile is to dial 911 on the cellphone, and then steal the car in one case the cops arrive. Lose your wanted level one time you accept the motorcar, and and then stop and admission the figurer. Select 'Search Police Records' followed past 'Search by Photo', and and so upload the photo of the target sent to you by the contact. His name is Adam Dimayev, and he's wanted for financing terrorist activity. Mark Dimayev's hangout on the radar, and then go after him.
The hangout is occupied by around 10 people, and your contact states that you must eliminate all of them. Start on the upper level of the hangout (Yorktown Avenue) before dealing with the guards on the lower level (Valley Forge Avenue). At that place is no fourth dimension limit, and so you can take as long equally yous like to eliminate all of them. You tin can accept them out systematically one-by-one (using cover behind the various objects in the environment) or you lot can but launch grenades and take them out several at a time. If you need health at whatsoever time, get to Yorktown Artery where there are no attackers present and dial 911 for paramedics. The paramedics volition then arrive and give y'all health, but merely at a price.
![]() The contact congratulates you on a job well done, and says you are 1 step closer to finding the man you are subsequently.
The contact congratulates you on a job well done, and says you are 1 step closer to finding the man you are subsequently.
Some guy is moving a lot of money for terrorists, and U.L.P.C. need him "neutralized." Catch a vehicle and go to the Civilization Plaza. A helicopter is seen leaving from the helipad, and as per the instructions, you must follow it to its destination before attempting to steal it. The chase ends at Kunzite Street, Westminster. Permit the helicopter land, and then motion in and take it.


When yous bulldoze in towards the helicopter, at that place are 3 guards up ahead, so drive at full speed and take out equally many every bit you can by merely running them over. Then leave of the vehicle, accept cover and eliminate any remaining guards.
Get in the chopper and fly to the dropoff signal on the south side of the aerodrome. Land at the location indicated by the yellow bleep on the radar, and and then a cutscene volition evidence two FIB agents taking command of the chopper. Mission complete. Niko calls the contact afterwards the mission, who says that his men "have the chopper" and "volition get information technology dorsum to yous" soon. Apparently yous're going to apply the chopper later to eliminate the guy they are later.

Officeholder McReary is the mystery man. You met him briefly during the mission "Street Sweeper." McReary states that he "knows all about" Niko's activities, and threatens to expose him unless Niko does some work for him. Some guy is blackmailing McReary, simply he doesn't know who information technology is. He has bundled to do an exchange with McReary by the Humboldt River off Silicon Street, and he told McReary to call him at that place from the viewpoint.
When y'all arrive at the viewpoint, Francis will ship a text bulletin containing the phone number of the blackmailer, and you must call this number and look out for a person answering their phone, and then that you know which person to kill. Keep talking to the blackmailer until y'all identify him.

Kill the blackmailer once you have identified him, collect the storage device for Francis, and then lose your two-star wanted level. Once that is done, take the photographs on the storage device back to Francis to stop the mission.
![]() U.Fifty.P.C. call to say that "the chopper is ready" and that y'all must employ it with Lilliputian Jacob to take out the target.
U.Fifty.P.C. call to say that "the chopper is ready" and that y'all must employ it with Lilliputian Jacob to take out the target.
Meet Little Jacob at the salvage yard off Grummer Road and get into the chopper. The target is in another chopper, flying around Liberty City, and you lot'll need to follow him and look for an opportunity to accept information technology downwards. U.L.P.C. don't desire whatsoever civilian casualties, and so yous'll have to wait until the target is flying over the water earlier firing a shot at it.
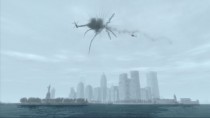
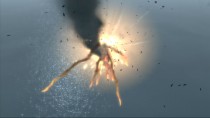
Once you lot reach the water across the Broker Bridge, get close to the chopper and stay level with it on the right manus side and then that Piffling Jacob tin get a good shot in with the RPG.

One time the chopper is down, accept Jacob dorsum to the helipad at Spousal relationship Drive E to consummate the mission. Niko calls U.L.P.C. afterwards to confirm that the hit was carried out successful. The contact acknowledges your work, and agrees to call you lot when/if he finds any data on the person you are looking for.
![]() Packie McReary calls to offer y'all some work. You tin accept missions from Packie past following the "PYard" icon on the radar.
Packie McReary calls to offer y'all some work. You tin accept missions from Packie past following the "PYard" icon on the radar.
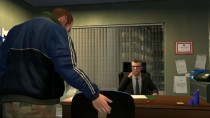
A lawyer called Tom Goldberg (of Goldberg, Ligner & Shyster) has some dirt on McReary, and McReary wants him dead. Goldberg has bodyguards, so McReary wants you to go one-on-one with him past arranging a chore interview. You'll need to look dainty for the interview. McReary will e-mail you more than details soon, and so head over to an internet cafe after the cutscene.

Admission i of the estimator terminals at the cyberspace cafe, and click on the "Goldberg, Ligner & Shyster" advertisement to access their website. Then go to the "Careers" page and submit your resume. Niko calls Francis after you leave the cafe to confirm that the application has been sent. You now need to wait on a phone call from GLS. You can kill time by doing other missions and activities, or you can advance time by half dozen hours by saving your game at the safehouse.
Eventually, Karen from GLS volition telephone call to arrange an interview with Mr. Goldberg. The time of the interview will exist added to your organizer automatically - you need to be at the lawyers' role by 12:00 the following solar day. Now head over to Perseus and purchase yourself some new clothes. You'll need a suit, a tie and some dainty shoes for the interview.
Once you take everything you demand, caput over to the lawyers' part (indicated by the tie icon on the radar) and walk into the yellowish mark to brainstorm. Go and talk to the receptionist, and then follow her to Mr. Goldberg'southward function. The interview volition brainstorm, and a few seconds afterwards yous volition accept command over Niko. Stand up upwardly when you are prepare to kill Goldberg, kill him and then recollect the files from his desk-bound. The receptionist triggers the alert, and you lot now have a two-star wanted level. Boom one of the windows in the office, jump exterior and get rid of the cops. Take the files back to McReary once you're done.
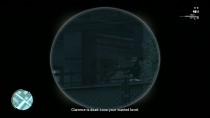
McReary wants Niko to have down a drug dealer (called Clarence) in East Holland for $2000, just Niko demands $5000 instead. McReary says information technology would have besides long for him to collect all the evidence against Clarence, so he wants to save himself some work past getting Niko to perform a hit.
Head over to the projects in East Holland, and ensure that you have plenty of health and ammo before first. McReary recommends getting to the second floor before you begin shooting anyone, but you tin do it in any way you similar. One time you reach the third floor, in that location are gunmen taking cover up alee, and a starting time help kit on the wall to your right. Accept them out, and a third gunman will come up down the stairs behind you, so watch out. Remain cautious as you approach the roof - there are several more gunmen waiting there. Once everyone has been eliminated, approach Clarence and you volition have a choice to make - you can either execute him or make up one's mind to let him live. Walk away if you lot wish to spare his life, you'll see him later on if this is your option.
If yous want to kill Clarence and y'all wish to avoid any unecessary shootouts, go back onto the road before inbound the projects at the start of the mission, and employ your sniper rifle to zoom in on Clarence on the second floor. Impale Clarence, and evade the 2-star wanted level to complete the mission. If you don't get the shot right the first time, Clarence will flee and you will have to enter the projects and do things the hard way.
If you lot spared Clarence's life, or if you decided to kill him the hard way, a two-star wanted level is gained and law surround the projects. Nigh of them will occupy the due west half of the complex (which is the bit yous are currently at) and then caput over to the east department and become down the stairs that way. Plough left when you accomplish the bottom, and and then left again. Apply the gate to get out, then discover a vehicle and evade the cops. If you're lucky, you should exist able to escape from the projects without having to confront any cops at all.
It becomes apparent that Clarence was but the boss of the organization, and now his primary lieutenant has taken over. McReary needs you to have him out. He has left a sniper rifle for you in a motorcar across town.
Get in the car so head to the dealer'southward apartment off Denver Avenue. Go to the rooftop of the edifice opposite the dealer's apartment, and dial his phone number (545-555-0122) to lure him to the window.
Alternative ways to lure the dealer to the window are:
- Shoot the satellite dish exterior the dealer'southward window (he'll get upward to find out why his TV stopped working).
- Shoot the television screen inside the dealer's house (you won't accept much time to shoot him if you choose this method).

Assassinate the dealer when he goes to the window, and then leave the edifice to complete the mission.
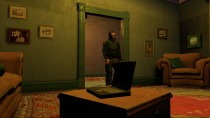
Packie introduces you to his mother and his sister, Kate. Kate seems interested in Niko, only Packie warns him to stay away from her. After the cutscene, get in a machine with Packie and go to the harbor warehouse on Emerald Street. Packie wants to get up on the roof of the warehouse so you can get a articulate view of the deal that's going down with the triads. Climb onto the objects, leap onto the ledge, shimmy beyond, and so climb onto the roof. A short cutscene volition show a gunkhole arriving with some boxes which Patrick wants to steal. His plan is to wait until the dealers have loaded the boxes into the truck, and and then steal the truck and return it to a garage.
Climb down the mini cabin, discover cover, and begin taking the dealers out. Molotovs or grenades would be useful at this betoken, as at that place are a lot of attackers. Packie will assist you (from the roof) and detract some of the attention. At that place are several dealers within the warehouse, and then exist cautious when you approach it.
Steal the truck and wait for Packie to go far, and so have the truck to Ray Boccino's lockup in Westminster. Some more than dealers will begin chasing and shooting at the truck once yous leave the warehouse, then drop a few grenades to go rid of them. Packie introduces y'all to Ray at the end of the mission, and Ray agrees to call you some time with some piece of work.
Packie and his friends want to rob the mafia after Ray tipped them off about a big payment they received. Find a four-door car and drive to the waste management plant under the Algonquin Bridge, where the mafia are currently situated. Climb over ii fences to get into the depot, and waste material any guards outside. Grenades may be useful here, but be sure to take encompass at all times. Packie and the guys should be able to handle a few of the guards, but y'all'll demand to deal with most of them. Follow the guys inside in one case the guards have been taken out. In that location's a first aid kit at the door should you need any health.
Find cover as presently as you lot enter the building, and once once again pick off each of the guards one at a time. Go for the guard whose upward in the office earlier going for the others. When yous are ready, go along towards the function at the pinnacle of the stairs where the cash is stored. Sentinel out for more than guards.
Once you lot take collected the cash, more guards volition enter the building and begin firing. Clear the ones nearest the get out and then make an escape - leave Packie'south friends to deal with the remainder. Run into Packie exterior and then swim towards the boat. Wait for Packie to get on, and accept him to the pier beyond the East Borough Bridge to complete the mission.
![]() Packie asks if y'all tin practise him a favour by taking his sister Kate on a engagement. The McReary brothers are concerned nearly her because she hasn't been out in a long time. Give her a telephone call.
Packie asks if y'all tin practise him a favour by taking his sister Kate on a engagement. The McReary brothers are concerned nearly her because she hasn't been out in a long time. Give her a telephone call.
![]() Ray Boccino calls and invites y'all to meet him at Drusilla's in Little Italy (Algonquin) for some work.
Ray Boccino calls and invites y'all to meet him at Drusilla's in Little Italy (Algonquin) for some work.
![]() Packie and his brothers have a big chore planned, but you'll need a adjust and tie offset from Perseus in Algonquin kickoff. You need this in guild to showtime the mission "Three Leaf Clover".
Packie and his brothers have a big chore planned, but you'll need a adjust and tie offset from Perseus in Algonquin kickoff. You need this in guild to showtime the mission "Three Leaf Clover".
Packie introduces yous to his brothers, Gerry and Derrick. Gerry isn't happy that Niko is beingness involved in family concern. After the cutscene, find a 4-door car and take your partners to the bank in Algonquin. Packie explains the plan on the way at that place - each person is going to take out a security baby-sit each when they go in, and then Packie and Michael will handle the civilians while Niko and Derrick handle the employees. Derrick is going to rig the vault door with explosives once the situation is nether control.
During the raid, Packie and Derrick begin arguing, and Michael gets shot past one of the civilians. Afterwards the cutscene, go downward to the vault and get the money. The cops become aware of the robbery, and soon the unabridged building is surrounded past LCPD and Due north.O.O.S.E. officers. Make your fashion out of the building and accept embrace behind a tree.
Take out the cops and protect Packie and Derrick - then follow them into the alleyway and clear the path. Use the steps every bit cover, and throw a couple of grenades to have out the cops upward ahead. All the Due north.O.O.Southward.E. officers must be eliminated before Packie and Derrick can proceed. Once they do, follow them, and once once again clear the path.
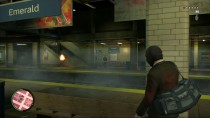
When you reach Chinatown, sentry out for the cops who are situated on the fire escapes above you. Again, articulate the path for Packie and Derrick, and and so follow them down the alley. More police arrive in a chopper, and so Packie decides to use the subway equally an escape road. Follow Packie and Derrick into the subway, and kill the two police officers immediately to your right as you enter. Use the pillars as encompass when you reach the area with the ticket machines, and accept out anyone who is in your mode.
There is a showtime assist kit attached to one of the pillars, so take hold of it if you need health. Follow Packie and Derrick down to the platform, and use the third (last) pillar as cover. Throw some grenades across to the other side to take out the attackers, and then follow Packie and Derrick onto the tracks. Watch out for oncoming trains!
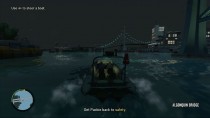
Once you reach street level, find a four-door car and arrive it with Packie and Derrick. You'll need to cross the Algonquin Span to become back to Packie'south place in Dukes, only police have blocked information technology off, so information technology is recommended that y'all lose your wanted level earlier attempting to cross the span. Utilize alleys and small roads when trying to escape from the cops - yous'll lose them much easier that way. Take Packie and Derrick back to Middleton Lane to complete the mission, and relish your hefty $250,000 advantage.

![]() Gerry McReary has a business organization opportunity that he needs your assist with. Follow the "YardYard" icon on the radar to take missions from him.
Gerry McReary has a business organization opportunity that he needs your assist with. Follow the "YardYard" icon on the radar to take missions from him.
![]() Packie wants you to do some work for Derrick McReary, as a personal favour to him and Gerry. They say they volition cover whatever expenses. Yous can find Derrick at the "DThou" icon on the radar.
Packie wants you to do some work for Derrick McReary, as a personal favour to him and Gerry. They say they volition cover whatever expenses. Yous can find Derrick at the "DThou" icon on the radar.
Korean Guys in Car Shooting Each Other With Airsoft Gun
Posted by: cheneflete.blogspot.com
0 Response to "Korean Guys in Car Shooting Each Other With Airsoft Gun"
Post a Comment